

Contacts
Contacts
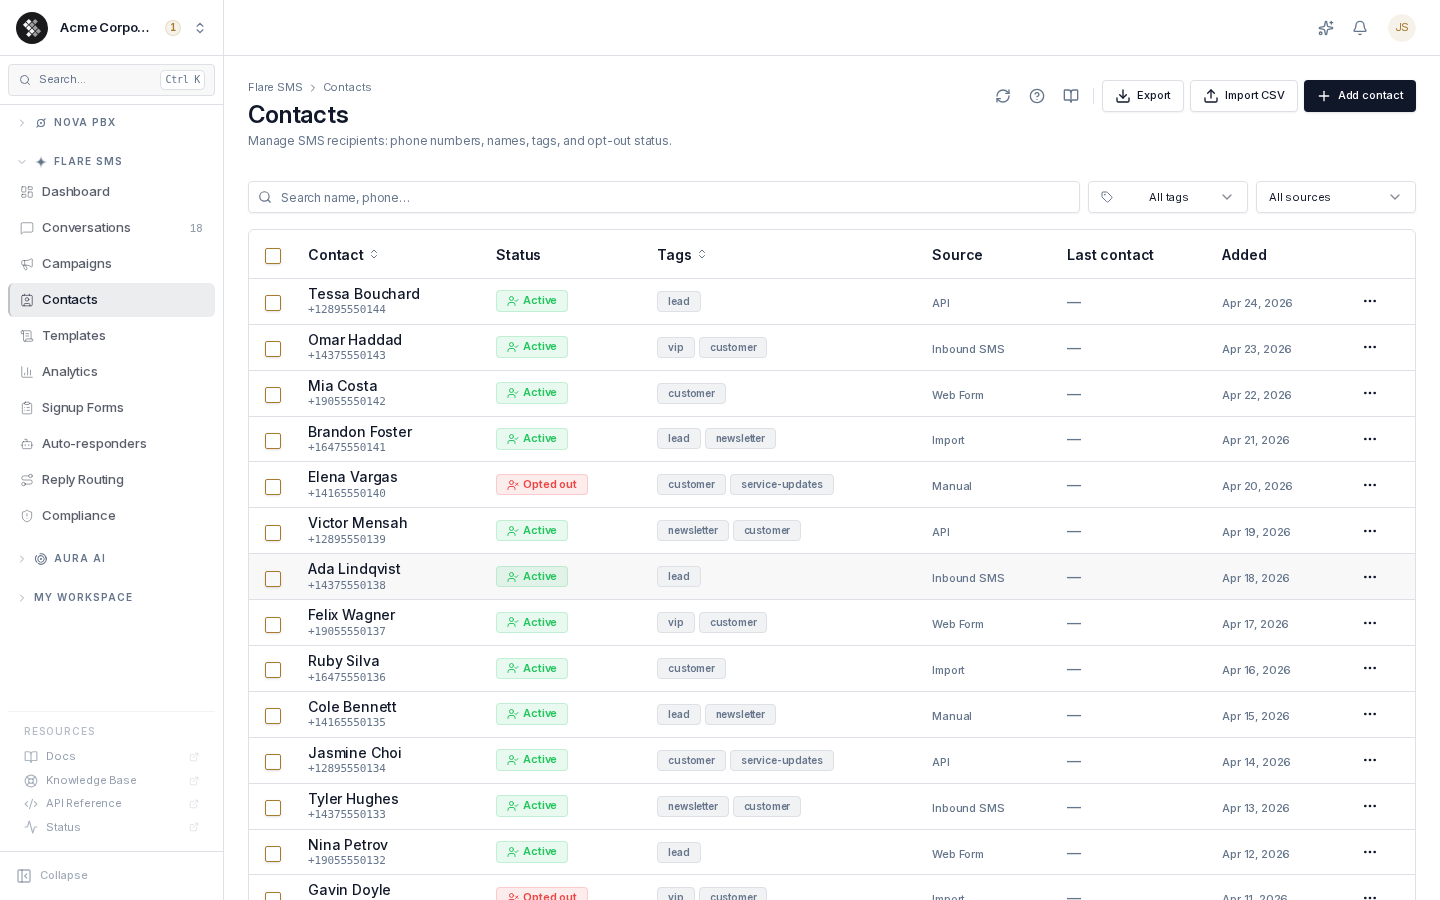
Section titled “Contacts”Contacts are the individuals your business can send SMS messages to. Navigate to Flare SMS → Contacts to view and manage your contact database.
Contact Fields
Section titled “Contact Fields”Each contact record stores:
| Field | Description |
|---|---|
| Phone number | Required. Normalized to E.164 format (e.g. +14165550100) |
| First / last name | Optional, used in {{first_name}} / {{last_name}} personalization |
| Optional | |
| Business | Optional company name |
| Tags | Flexible labels for segmentation (e.g. vip, lead, customer) |
| Source | How the contact was added: Manual, Import, Web Form, API, or Inbound SMS |
| Consent to text | Implied (the default) or Express — US numbers need express consent for marketing texts |
| Status | Active, Opted out, Bounced, or Blocked. Hover a badge for details (e.g. Opted out · SMS STOP · Sep 12). Opted-out contacts are excluded from all sends |
| Last contact / Added | When the contact was last messaged and when it was created |
Adding a Contact Manually
Section titled “Adding a Contact Manually”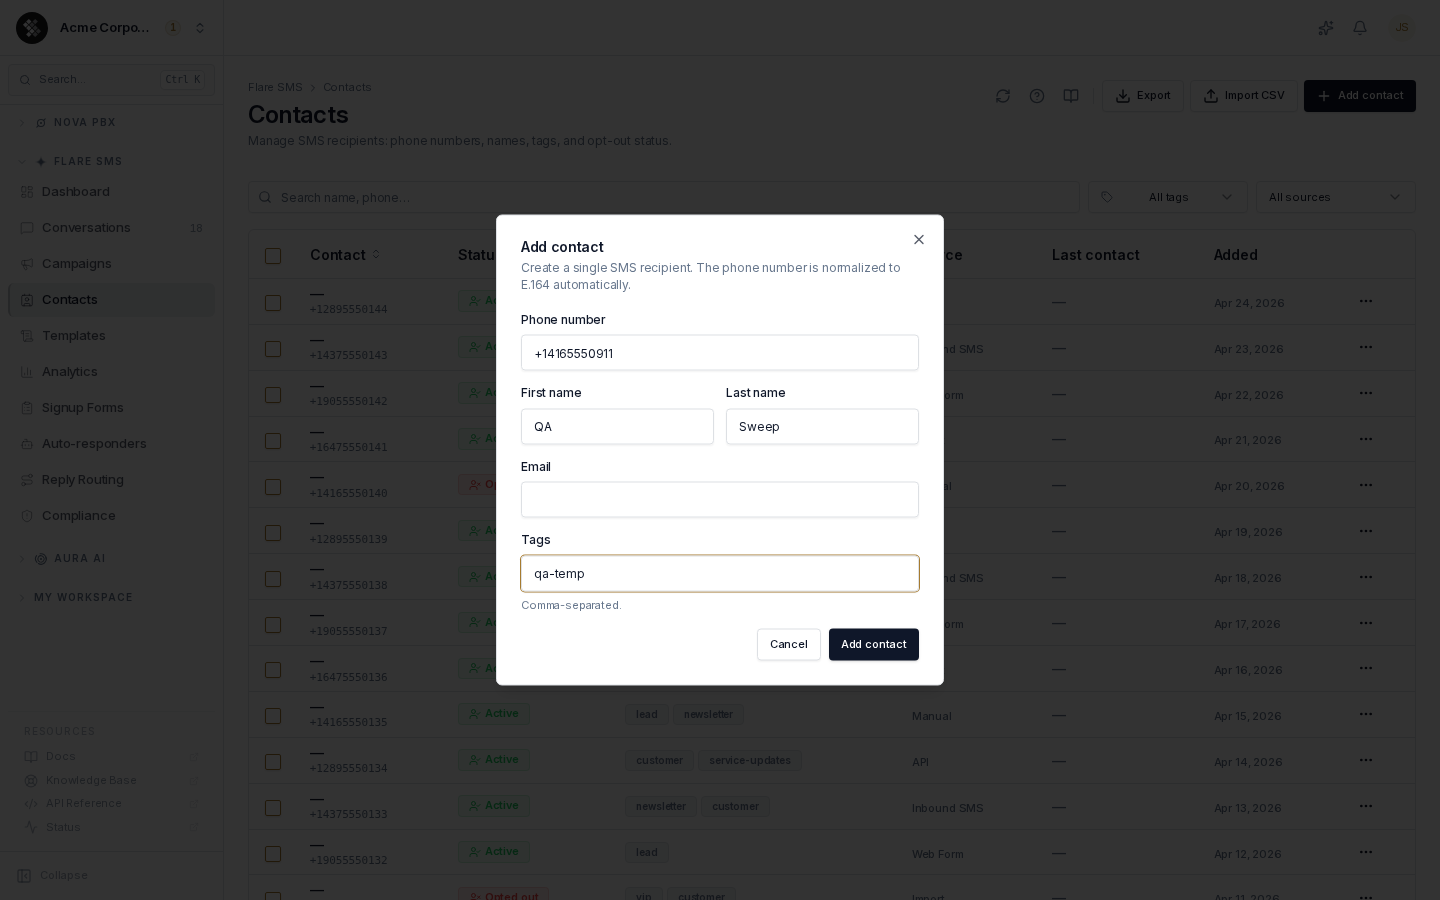
- Navigate to Flare SMS → Contacts.
- Click Add contact.
- Enter the phone number (required). Ten-digit North American numbers are normalized to E.164 automatically.
- Optionally add name, email, and comma-separated tags.
- Optionally set Consent to text — see Consent to Text.
- Click Add contact.
Importing Contacts from CSV
Section titled “Importing Contacts from CSV”- Click Import CSV.
- Choose your file. The phone column is required; headers are matched flexibly, ignoring case, spaces, hyphens, and underscores. For the phone column,
phone,phone_number,mobile,mobile_phone,mobile_number,cell,cell_phone,cell_number,number, andtelephoneall work, soMobile PhoneandCell Phoneheaders from a CRM export import as-is. Other columns match the same way:first_name,last_name,email,business/company, andtags. - Pick what happens on a duplicate phone number: Skip the row (default), Update existing fields, or Replace fields and tags.
- Optionally select existing tags (or type a new one) to apply to every imported row. Row-level
tagsvalues (separated by,,;, or|inside the cell) merge with these. - Click Import. A summary toast reports imported / skipped / failed counts.
If the import is refused
Section titled “If the import is refused”When nothing in the file can be imported, the whole import is refused and nothing is saved:
| Message | Why | What to do |
|---|---|---|
| CSV had no valid rows. Fix the listed errors and re-upload. | Every row was rejected: a phone number that isn’t valid, an invalid consent value or date (see Consent columns), or no recognised phone column in the file. | Fix the rows listed in the errors, check that the file has a phone column, and import again. |
| No contacts to import — upload a CSV or POST a contacts array | The file had no contact rows: it was empty, had only a header row, or every phone cell was blank. | Choose the right file, with at least one row that has a phone number. |
| That file isn’t a CSV. In Excel, choose File > Save As > CSV UTF-8 (in Google Sheets: File > Download > CSV), then upload the .csv file. (API: Invalid file type. Only CSV files are allowed.) | The file isn’t a CSV (for example an Excel .xlsx). | Save the file as CSV and import again. |
If the second message appears when you did choose a file with contacts in it, the upload didn’t reach SIPSTACK. Try again, and contact support if it keeps happening.
Developers can tell these cases apart by the response code: CONTACTS_IMPORT_NO_VALID_ROWS, CONTACTS_IMPORT_EMPTY_FILE, CONTACTS_IMPORT_NO_INPUT, or CSV_INVALID_FILE_TYPE — see Error Codes.
phone,first_name,last_name,email,tags+14165550100,Alice,Smith,alice@example.com,vip6475550200,Bob,Jones,,"customer,newsletter"Consent columns
Section titled “Consent columns”Three optional columns record consent to text:
| Column | Values |
|---|---|
consent | express or implied (any case). Blank means implied. |
consent_date | The date express consent was obtained, YYYY-MM-DD. Cannot be in the future. Blank uses the import date. |
consent_method | How express consent was obtained, as free text. Blank is recorded as “import (declared by uploader)”. |
phone,first_name,consent,consent_date,consent_method+12025550143,Dana,express,2026-09-01,Paper signup sheet at the front desk+14165550100,Alice,implied,,- A row with any other
consentvalue, or aconsent_datethat is invalid or in the future, is not imported and is listed with the import errors. - Each express row is saved to the contact’s consent history, with you as the person who declared it.
- Import only ever upgrades consent: an
impliedor blank row never downgrades a contact that already has express consent.
Searching and Filtering
Section titled “Searching and Filtering”- Search matches name, phone number, and email, across your whole list (not just the page you’re on).
- Tag filter — every tag with its contact count.
- Source filter — Manual, Import, Web Form, API, or Inbound SMS.
- Status filter — All, Active, Opted out, Bounced, or Blocked, each with its count. Opted out includes every contact opted out by STOP, web, or an admin. Bounced covers hard bounces, carrier blocks, and landlines. A soft bounce is temporary and still counts as Active.
- Consent filter — Express, Implied, or None.
Click the Contact, Status, or Added column header to sort. Your filters, search, and sort are saved in the page URL, so you can bookmark or share a filtered view.
Tags are the primary segmentation mechanism: campaigns target audiences by tag, so a clean tag taxonomy here pays off at send time.
Editing a Contact
Section titled “Editing a Contact”Click a row (or Edit in the row menu) to update the phone number, name, email, business, tags, or consent to text. Changes apply immediately. Message history follows the contact record, so editing a phone number preserves the existing thread.
Consent to Text
Section titled “Consent to Text”Each contact’s consent is Implied (the default for contacts you add or import) or Express. Express consent is required to send marketing texts to US numbers: campaigns and drip steps skip US contacts without it. See US Recipients: Express Consent.
To record express consent, add or edit the contact and set Consent to text to Express, then fill in:
- How was it obtained? — Web form, Paper or in-person signature, Verbal (recorded), or Other. Other needs a description; for the rest, details are optional.
- Date obtained — today by default. It cannot be in the future.
The change is saved to the contact’s consent history, along with who made it. Editing a contact that already has express consent shows how it was obtained; changing it back to implied asks you to confirm first.
Opt-Out Management
Section titled “Opt-Out Management”When a contact replies with an opt-out keyword (STOP, UNSUBSCRIBE, etc.), SIPSTACK automatically flags them Opted out: they keep their history but are excluded from all sends. Contacts can opt back in by texting START.
You can opt a contact out manually from the row menu. Manual opt in is also available, but only use it with a clear consent record from the contact. If the contact opted out by texting STOP, Opt in asks for a reason — for example, how they gave you permission again. The reason is required and is saved to the contact’s consent history along with who made the change.
Bulk Actions
Section titled “Bulk Actions”Tick the checkboxes on the rows you want, or tick the header checkbox to select the whole page (50 contacts). The toolbar then offers:
- Add tag / Remove tag — add one tag to every selected contact, or remove one tag from them.
- Opt out — opt every selected contact out. Each opt-out is saved to the contact’s consent history with your name and an optional reason. There is no bulk opt-in: opting a contact back in is done one contact at a time.
- Export — download a CSV of the selected contacts, with the same columns as the full export below.
- Delete — remove the selected contacts from your list.
Select every matching contact
Section titled “Select every matching contact”After you tick the header checkbox, a bar offers Select all N contacts that match. Click it to select every contact that matches your current search, tag, source, status and consent filters, not only the page on screen. Delete, Add tag, Remove tag and Opt out then act on all of them. Export downloads the whole filtered list.
Large actions run in the background
Section titled “Large actions run in the background”An action on more than one page of contacts runs in the background. A progress bar shows on the Contacts page, and you can keep working. A message tells you when it is done. Only one bulk action runs at a time for each organization.
Shortcuts
Section titled “Shortcuts”The toolbar menu has three shortcuts:
- Delete all contacts in tag X — shown when a tag filter is active.
- Delete all opted-out contacts.
- Delete all bounced contacts — numbers that hard-bounced, are landlines, or were blocked by the carrier.
Deleting Contacts
Section titled “Deleting Contacts”To delete all your contacts: clear all filters, tick the header checkbox, click Select all N contacts that match, click Delete, then type the number of contacts to confirm. The delete runs in the background with a progress bar.
Ways to delete
Section titled “Ways to delete”- One contact — row menu → Delete, then type the contact’s phone number to confirm.
- Selected contacts — tick the rows and click Delete in the toolbar.
- Every contact that matches a filter — filter the list, tick the header checkbox, click Select all N contacts that match, then Delete.
- Shortcuts — Delete all contacts in tag X, Delete all opted-out contacts, or Delete all bounced contacts from the toolbar menu.
When you delete with Select all, or delete more than 50 contacts, you must type the number of contacts to confirm.
What deleting keeps
Section titled “What deleting keeps”Deleting removes contacts from your contact list. It does not erase their message history.
Opt-outs are kept. If a deleted number had opted out and you add it again or re-import it, it is still opted out. Deleting and re-importing never clears an opt-out (CASL/TCPA). Only the contact can opt back in, by texting START, or you can opt them in with a clear consent record.
Exporting Contacts
Section titled “Exporting Contacts”Click Export to download every contact that matches the current filters (tag, source, status, consent, and search) as a CSV, not only the page on screen. The columns are:
phone_number, first_name, last_name, email, tags, custom_fields, consent_status, opted_out, opted_out_at, opt_out_method, bounce_category, is_blocked
If you move contacts into another tool, keep the opted_out column. Texting an opted-out number from any system is still a compliance violation.
Related Pages
Section titled “Related Pages”- Conversations — message a contact directly
- Campaigns — target audiences by tag
- Signup Forms — collect opted-in contacts from the web
- Compliance — consent and opt-out reporting