

Account Setup
Account Setup
Section titled “Account Setup”This guide walks you through creating your SIPSTACK account and getting your organization ready to use. It links into the detailed Switchboard documentation at each step rather than repeating it — follow the links when you want the full field-by-field walkthrough.
Step 1 — Sign Up
Section titled “Step 1 — Sign Up”Create a self-serve account at switchboard.sipstack.com/signup. Signup is a six-step wizard that creates your organization, makes you its owner, and — on a trial-eligible plan — starts a 14-day free trial:
- Account — name, work email, company name, password
- Company details — country (sets your billing currency and pricing region), industry, company size
- Choose your Flare plan — the SMS tier to start on, or pick “I don’t need SMS” if you only want the phone system. Declining SMS means no Flare plan is created and nothing Flare is charged
- Nova phone system — bundle a Nova PBX Pro trial on the same 14 days. This step is optional when you have a Flare plan, and required when you declined SMS (Nova is then your plan). Either way you pick your PBX address — the permanent identifier behind your SIP domain (
<address>.nova.sipstack.com), pre-filled from your company name and availability-checked as you type - Payment — a card is always required. On a trial-eligible plan (Flare Pro, Nova Pro) $0 is charged today and billing starts on day 14 unless you cancel. Core and Ultra are direct-purchase tiers — those start and are charged as soon as you complete signup, and the signup screen says so before you enter a card
- Invite your team (optional) — up to five teammates as Admin or Billing users
The full walkthrough — password rules, email verification codes, promo codes, and signup troubleshooting — is on Creating Your Account.
Step 2 — First Login & the Setup Checklist
Section titled “Step 2 — First Login & the Setup Checklist”After signup you are signed in immediately and land on your dashboard. Switchboard tracks your remaining setup in the Finish setup checklist — open the organization switcher (your company name, top-left) and click Finish setup to see what’s left:
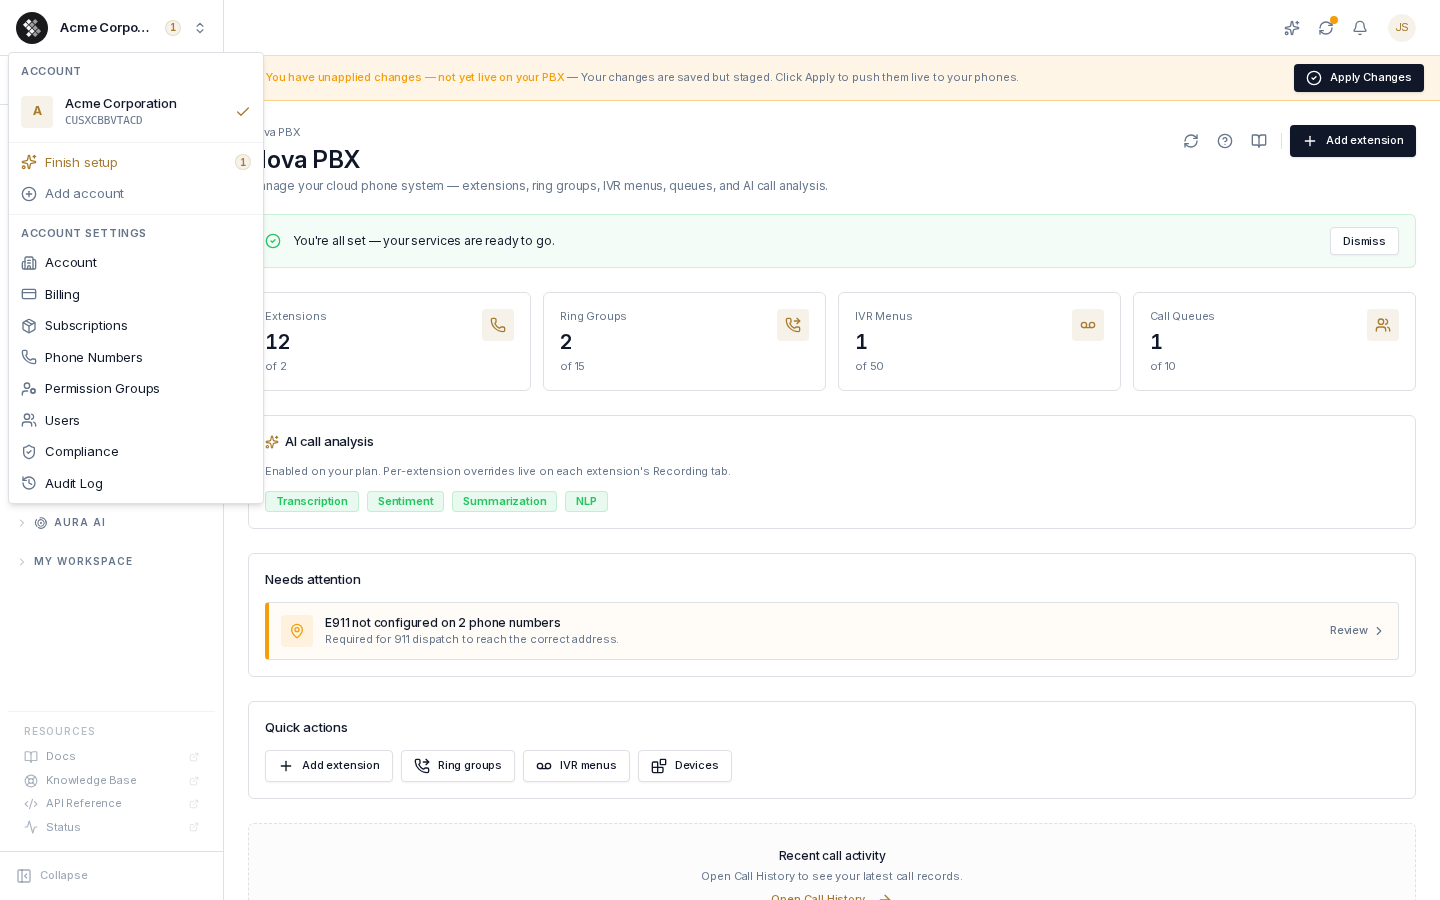
Steps are grouped by product — you only see steps for products you are subscribed to or trialing — plus an Account group for work that belongs to the organization rather than to any one product. Every step’s state is read live from your account, so nothing is ticked off by a stored flag: remove the underlying thing and the step comes back.
Two steps only appear in certain accounts:
| Step | When you see it |
|---|---|
| Add a payment method (Account) | When your organization is billed by card. It takes you to Account → Billing to add a card so service keeps running when your trial ends. Organizations billed another way don’t see it at all. |
| Add your office location (Nova PBX) | While the 911 location requirement is on for your phone system. It sits ahead of Create an extension, because an extension cannot be saved until the address it dials 911 from — and someone to notify — exists. |
While your Nova steps are incomplete, that group also offers a Set up team shortcut — see Set Up Your Team, which creates extensions, sign-in accounts, and app access for your whole roster in one pass.
The same menu is how you reach every account-level page: Account (settings), Billing, Subscriptions, Phone Numbers, Permission Groups, Users, Compliance, and Audit Log.
Step 3 — Review Your Organization Settings
Section titled “Step 3 — Review Your Organization Settings”Open Account → Account to verify your organization profile:
- Organization name — appears throughout Switchboard; see Account Settings for how name changes work
- Addresses & emergency address — required before placing calls; E911 depends on it
- Security — enable Two-Factor Authentication for your login
Step 4 — Review Your Plan & Trial
Section titled “Step 4 — Review Your Plan & Trial”Your trial subscriptions appear on Account → Subscriptions with their end dates. From there you can:
- Change tiers or cancel before day 14 to avoid any charge — see Managing Subscriptions
- Add the other product with Add Nova PBX or Add Flare SMS below your subscriptions — see Adding a Product
| Product | What it’s for |
|---|---|
| Nova PBX | Hosted cloud phone system — extensions, call routing, voicemail, devices |
| Flare SMS | A2P SMS campaigns, two-way messaging, contacts, automation |
| Aura AI | AI voice agents, Voice Studio TTS & cloning — included with paid Nova/Flare plans |
On day 14 your card is charged for the plan(s) you kept and the subscription becomes active.
Step 5 — Invite Your Team
Section titled “Step 5 — Invite Your Team”If you skipped invites during signup, add teammates from Account → Users: each user gets an email with a link to set their password, and you assign them seats on your subscriptions plus a permission group that controls what they can do. See Managing Users.
What to Do Next
Section titled “What to Do Next”- Quick Start Guide — add your first extension, buy a number, and route a call
- Navigating Switchboard — understand the portal layout
- Buy a Phone Number — or port your existing numbers in
- Set up 10DLC — required before sending A2P SMS to US/Canadian numbers